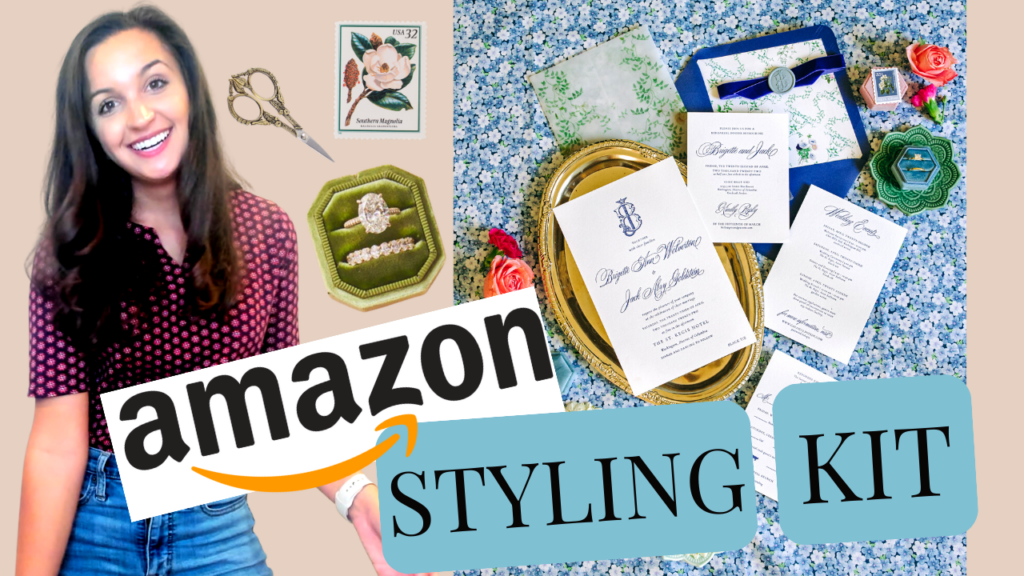
In this Youtube video I show you the wedding photographer styling kit you need in your bag on wedding days! Having a wedding photographer styling kit has really helped me in getting the most out of the flat lays. It also helps me feel as though there are areas of a wedding I can control, which is sometimes I rare find! In this video I share everything that I use to style wedding flat lays: silver trays, acrylic blocks, ring boxes, stamps, wax sealers, and more.
Most of the items can be found on Amazon, and I have them linked in my Details and Styling folder here on my storefront: https://www.amazon.com/shop/influencer-16bb90b4
In today’s video I wanted to show you what is inside my wedding photography styling toolkit. Everything that I use to style flat lays, wedding invitations, wedding shoes, back, backgrounds, everything that I use I’m going to show you in today’s video.
Most of it is from Amazon, the only thing that is not are the silver trays.
Silver Trays:
I got these at the dollar store. They are just little plastic silver trays, and they’re great for putting down and putting the invitations on top of it. So I have this one and a square one. Um, my advice for trays is not to get them that, not to get ones that are like way too big. I have really had a lot of success with these because they’re manageable and when they’re smaller. I find that they look better when they’re just a little smaller than you would think.
I think you need both silver and gold.
Trinkets:
I think they’re all under $15. These are really nice for putting in the corners of photos, adding rings to them, or adding even the ring, um, the velvet, like, ring box on top of just for, like, some depth.
Ring boxes:
They’re just really nice and they’re pretty affordable. And they look really good in photos. They make this in every color and I have a bunch of them. What I like to do with these is put them in the photo and still use the cap somewhere else in the photo.
I feel like it complements the details well when there’s both, there’s two things on each side for each light, if that makes sense.
Stamps:
I keep them all in one big bag. They’re vintage stamps and they look so nice when you add them in when they match. It’s an easy thing to bring in one big bag.And then I usually just dump it, um, dump it out and find the matching colors. Just make sure if you are doing details with these, I feel like that’s something I see photographers do, is put the stamps in with like the shoes or the veil. And stamps are supposed to be photographed with stationary, so it’s supposed to be implied that you’re mailing the invitation. So make sure that when you’re adding things to details that it makes sense.
Wax Sealer:
I have this wax sealer. I feel like it’s cute too, but it doesn’t make sense to include this thing in the details unless there’s actually wax seals there. So, this is also from Amazon.
Acrylic Blocks:
Something else that did my styling kit are these acrylic blocks. I also got these on amazon. They make a big difference in your flat lays when you’re able to elevate certain invitations and if you don’t want to invest in actual blocks, I was actually using the lens caps for the longest time. So the cap that goes, you know in the back of the lens, it is almost the same depth as one of these.
I just use the lens cap, but um, they’re not too, you know, they’re, they’re not too expensive and they really, really do make a big difference if you are able to elevate the invitations in your flat light in some way. So I can show you examples of it. Okay, so here’s a little clip of me using all the things I was showing you.
So next week I’m going to be talking more in depth about how to choose a flat lay background and board that goes well with the invitation piece. So if you’re a wedding photographer make sure to hit that like button if you like photographing wedding day details and subscribe because I will see you in next week’s video.
Watch the full Youtube video of this blog post, The Wedding Photographer Styling Kit You NEED:
I do have free email templates for photographers if you want to download those down below. This was super short and sweet video, but I hope it helped you in setting up an awesome anniversary sale for your wedding clients.
Make sure to subscribe and we’ll see you guys later here on YouTube!
If you enjoyed this blog post or Youtube video, you might also enjoy my email templates for wedding photographers, you can get here:
as well as other freebies here on the site.
And if no one had told you lately, I believe in you and your business.
–
More links:
💛 Join Facebook Group for Photographers: https://www.facebook.com/groups/651847955241023/
✅ Freebies for Photographers: Wedding Consultation Cheat Sheet: https://samiaeducation.ck.page/462825f5df
Wedding Pricing Guide: https://samiaeducation.ck.page/00a165bd7b
Wedding Day Timelines: https://samiaeducation.ck.page/c683c39a62
Instagram Reels Guide: https://samiaeducation.ck.page/00e1d300eb
Wedding Schedule Spreadsheet:https://samiaeducation.ck.page/77176e76aa
Camera Equipment List: https://samiaeducation.ck.page/8a8118c50f
Email Templates for Wedding Photographers: https://samiaeducation.ck.page/d2f1322ae7
💛 50% OFF Honeybook: http://share.honeybook.com/gG8Fv
Full Honeybook Walkthrough Youtube Video: https://youtu.be/3C4piRcf8eo
Thanks for watching!

